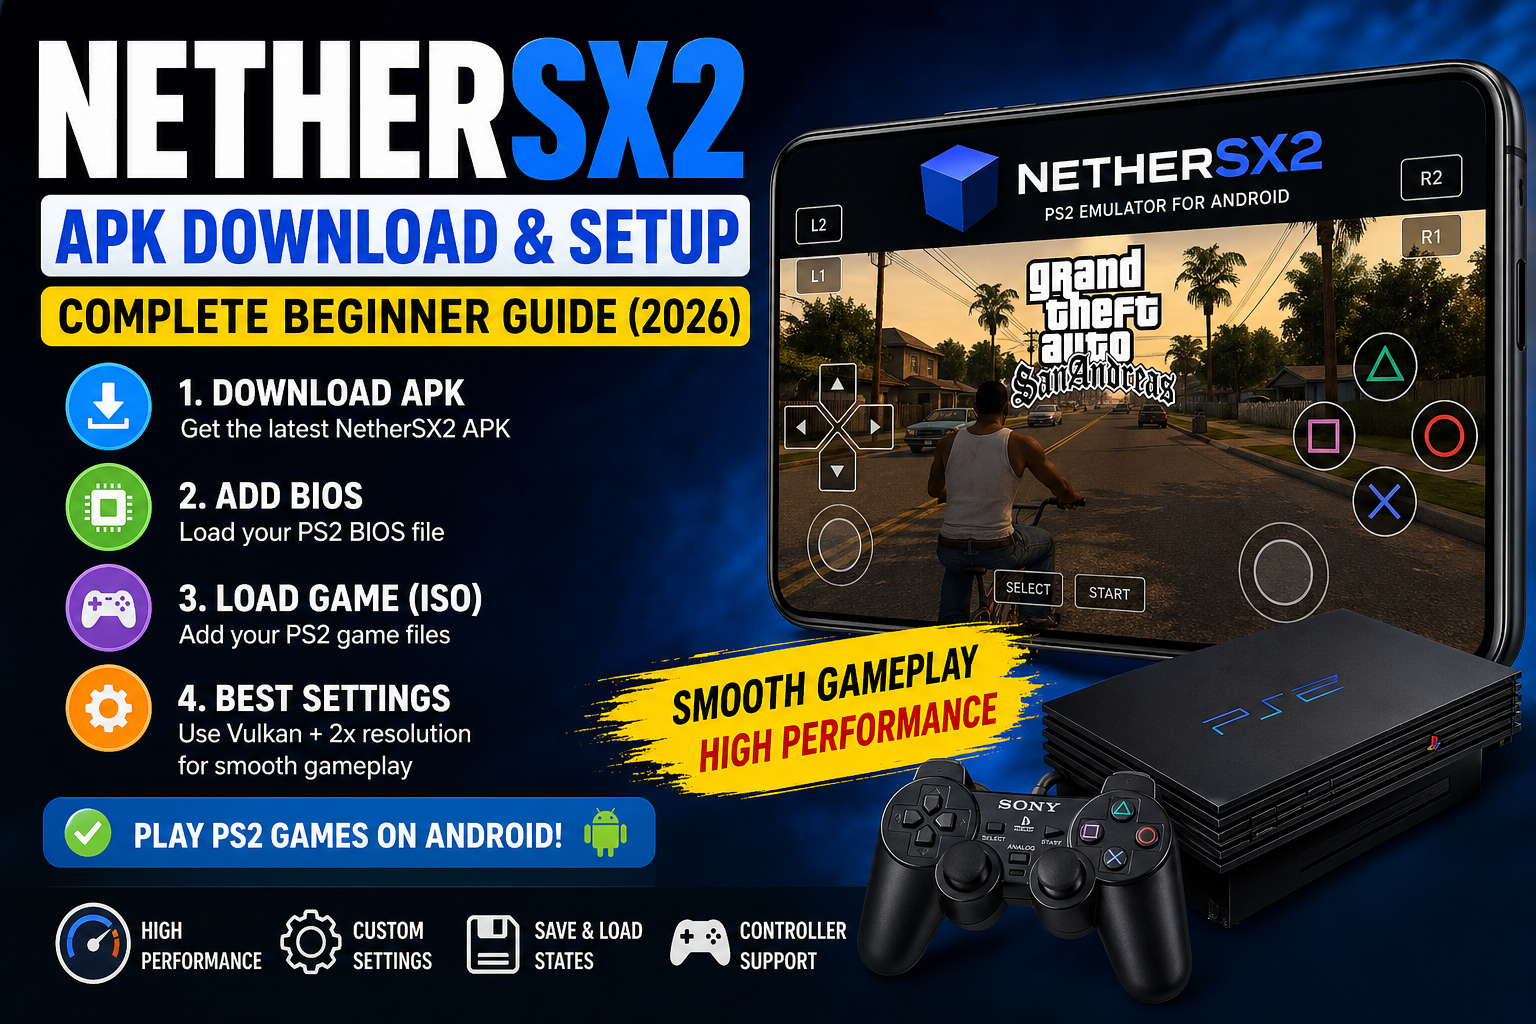
Quick Answer: To set up NetherSX2, download the APK from the official site, install EX File Manager from Google Play, create this folder path on your phone: Internal Storage → Games → ROMs → PS2 (with a BIOS folder inside PS2), import your BIOS file, add your game directory, set GPU renderer to Vulkan, and create an 8MB memory card. That’s the full setup in one go — the detailed steps are below.
Do you want to play your old PlayStation 2 games on your Android phone? Good news — you totally can! With an app called NetherSX2, your phone can become a PS2 gaming machine. We tested it on a Samsung Galaxy Fold 7 and played Crash Bandicoot: Wrath of Cortex at 3x graphics quality — and it ran super smoothly.
This guide will help you set it up even if you have never done anything like this before. It does not matter if you have a cheap phone or an expensive one — this guide covers all device types.
Let’s get started!
What is NetherSX2 and Is It Safe? {#what-is-nethersx2}
NetherSX2 is a free app for Android that lets you play PlayStation 2 (PS2) games on your phone or tablet. Think of it like a pretend PS2 inside your phone — it copies how the real console works so your games run on your device.
It was created by a developer called Trixarian and is based on an older app called AetherSX2, which stopped getting updates in 2023. NetherSX2 picked up where AetherSX2 left off, and in June 2025, it got a big update called Version 2.0 with much better performance and a new control layout.
Also Read: Blooket Bot Guide: How It Works, Risks & Safe Tips
Is NetherSX2 Safe?
Yes — as long as you download it from the right place. The safe and official source is the NetherSX2 GitHub page (by Trixarian). Avoid random websites that offer APK downloads — they may have viruses.
Important Legal Notice
Please read this carefully. NetherSX2 itself is completely legal. However, you must legally own the PS2 games and BIOS files you use with it. Downloading games or BIOS files from the internet without owning the original discs is called piracy, and that is illegal. This guide is for educational purposes only and does not support or encourage piracy.
What You Need Before You Start {#what-you-need}
Before we install anything, let’s gather everything you need. Think of this like packing your bag before a school trip — it’s easier if everything is ready first.
Here is your checklist:
- NetherSX2 APK file — download from the official website (nethersx2 or the GitHub page)
- EX File Manager — a free app from Google Play Store (made by Ace Mobile). This helps you open ZIP files and move files around your phone. It is fast, free, and easy to use.
- PS2 BIOS file — this is a small file that the emulator needs to start. You need to dump (copy) this from your own PS2 console. You cannot legally download it from the internet.
- PS2 game files — these are called ROM files (usually in .ISO or .BIN format). Again, you need to rip these from your own game discs.
Why EX File Manager? We recommend it specifically because it can open any zip format, it lets you see all the folders on your phone (including hidden ones), and it is completely free. If you already have another file manager you like, that is fine too.
Setting Up Your Folder Structure (Do This First!) {#folder-structure}
This step is very important. Many people skip it and then wonder why things do not work. Setting up your folders correctly saves you a lot of trouble later.
Open EX File Manager and go to Internal Storage. Now create this folder structure:
Internal Storage
└── Games
    └── ROMs
        └── PS2
            ├── (your game files go here)
            └── BIOS
                └── (your BIOS files go here)
Step-by-Step: How to Create These Folders
Step 1: Open EX File Manager and tap Internal Storage.
Step 2: Tap the three dots in the top corner → tap New → tap Folder → name it Games.
Step 3: Open the Games folder. Create a new folder inside called ROMs.
Step 4: Open ROMs. Create a new folder called PS2.
Step 5: Open PS2. Create one more folder called BIOS.
That’s it! Your folder structure is ready.
How to Add Your BIOS File
Go back to your Downloads folder in EX File Manager. Find your BIOS zip file. Press and hold it → tap More → tap Extract To → tap OK.
Now select all the extracted files, tap Copy, navigate to Games → ROMs → PS2 → BIOS, and tap Paste. Done!
How to Add Your Game File
Find your game ZIP file in Downloads. Press and hold it → extract it the same way. Copy the extracted game folder and paste it into Games → ROMs → PS2.
Tip: Bigger games (especially PS2 games, which were on DVDs) may take a minute to extract. Be patient — it is normal.
How to Install NetherSX2 {#how-to-install}
Now let’s install the app. This is easy.
Step 1: Open EX File Manager → go to your Downloads folder → find the NetherSX2 APK file.
Step 2: Tap on it. A message will pop up asking how you want to install it. Choose Package Installer.
Step 3: If your phone says it blocked the install, go to your phone Settings → Security and turn on Install from Unknown Sources (or “Allow from this source”). This is safe because we are installing from a trusted file.
Step 4: Tap Install and wait. The app is very small, so it installs in just a few seconds.
Step 5: Tap Done — but do NOT open the app yet! We have a little more to set up first.
First Launch Settings — Explained by Device Type {#first-launch-settings}
Now it is time to open NetherSX2 for the first time. When you open it, it will guide you through a setup screen. Here is exactly what to choose at each step.
Step 1: Choose Your Performance Setting
This is the most important choice for your device type.
| Your Device | Choose This Setting |
|---|---|
| High-end phone (e.g. Samsung Galaxy S23, Fold 7, Pixel 8) | Optimal Safe Defaults |
| Mid-range phone (e.g. Samsung A-series, Redmi Note) | Optimal Safe Defaults (try this first) |
| Low-end or older phone | Fast Unsafe Defaults |
Our test: On a Samsung Galaxy Fold 7, we chose Optimal Safe Defaults and it worked perfectly. Crash Bandicoot: Wrath of Cortex ran at 3x upscale with smooth, clean graphics.
Step 2: Display Settings
- Expand to Cut-Out Area — Only turn this on if you want the game to fill your phone’s notch area. Some bits may get cut off though.
- Aspect Ratio — Choose Auto Standard. This keeps games looking the way the developers originally designed them. You can also try Widescreen if you prefer.
- Theme — Light or dark, totally up to you.
Step 3: GPU Renderer (Very Important!)
Tap the GPU Renderer option and change it to Vulkan.
Vulkan gives you the best performance on most Android phones. Think of it as putting premium fuel in a car — your games will run better and smoother.
But what if my games still lag? If you are on an older phone and Vulkan causes problems, switch back to OpenGL. OpenGL is slower but more stable on older hardware.
Step 4: Upscale Multiplier (Graphics Quality)
This controls how sharp the graphics look. Higher = better looking, but also harder on your phone.
Our recommendation: Start at 1x (Native). Get your game running smoothly first. Once it is working well, go back into settings and increase it.
- 1x — Original PS2 quality (lowest load on your phone)
- 2x — Noticeably sharper, still performs well on most mid-range phones
- 3x — Looks great; works smoothly on high-end phones (we tested this on Galaxy Fold 7)
- 4x and above — Only for very powerful phones or tablets
Pro tip: You can also change this per game (we will cover that later). So you could run God of War at 1x and a simpler game like Crash Bandicoot at 3x.
Step 5: Import Your BIOS File
Tap Import BIOS. This opens a file browser. Navigate to Games → ROMs → PS2 → BIOS and select the large file in there. Wait for it to import.
Ran into an error? If the import fails, do not panic. Go to the burger menu (three lines in the top corner) → App Settings → BIOS → Import BIOS and try again from there. This is a known glitch that sometimes happens on the first launch — the fix always works.
Step 6: Add Your Game Directory
Tap the + button → navigate to Games → ROMs → PS2 → tap Use This Folder → tap Allow.
NetherSX2 will now scan that folder and find your game. It should appear on the home screen.
How to Set Up Your Controller {#controller-setup}
Using the Touch Screen (No Controller)
Tap the burger menu (three lines) → Controller Settings → Touchscreen.
Set these options:
- Touchscreen Controller View: Dual Analog Pad (this shows both thumbsticks on screen)
- Port: Port 1
- Controller Type: DualShock 2
- Enable Game Vibration: Turn this on if you like haptic feedback
That is all you need. Your on-screen controls are now ready.
Using an External Controller (Bluetooth or USB)
Plug in or pair your controller first. Then go to Controller Settings → tap Automatic Mapping. The app is smart — it will detect your controller and map the buttons automatically. It does a good job most of the time.
If you want to change a specific button, just tap the button name in the list, then press the physical button on your controller. Easy.
Tip: Set up a hot key for quick save. Go to Hot Keys and map Quick Save to a button you don’t normally use. This way you can save your game in one button press, anywhere, any time.
How to Save and Load Your Game {#how-to-save}
This is the section most beginners struggle with. There are two different ways to save in NetherSX2 — and many people do not know about both.
Method 1: Memory Card Save (like a real PS2)
Before you can save inside a game normally, you need to create a virtual memory card.
How to create a memory card:
- Tap the burger menu → App Settings
- Scroll to Memory Cards
- Tap Create New Card
- Choose 8 Megabyte — this size works with 100% of PS2 games
- Name it something easy like “Memory Card 1”
- Tap Create
- Now tap on Memory Card 1 to select it as your active card
Done! Now when a game asks you to save, it will save to this virtual memory card just like a real PS2.
Why 8MB? Some games only support 8MB cards. If you pick a different size, some older games might not recognize it. Always use 8MB to be safe.
Method 2: Save States (save anywhere, anytime)
Save states are like taking a screenshot of your exact game moment. You can save at any point — even in the middle of a level or a boss fight — and come back to that exact moment later. Real PS2 consoles cannot do this, but emulators can. It is one of the best things about emulation.
How to save a state:
- While playing, press the back button on your phone (or swipe in from the side) to open the in-game menu
- Tap Save State
- Choose a slot (Slot 1, Slot 2, etc.)
- The game is saved instantly
How to load a save state:
- Go back to the main game list in NetherSX2
- Press and hold the game icon
- Tap Load State
- Choose the slot you saved in
- The game jumps right back to that exact moment
We tested this with Crash Bandicoot: Wrath of Cortex. Saved mid-level, exited the game, loaded the state — it jumped right back to that exact spot. Worked perfectly.
Per-Game Settings Override {#per-game-settings}
Here is a power user trick that most guides never mention.
Every game is different. Some games run perfectly at 3x upscale. Others — like God of War or Gran Turismo — are very demanding and might slow down at high settings. Instead of changing your global settings every time, you can set custom settings for each individual game.
How to do it:
- On the game list, press and hold a game
- Tap Game Properties
- Here you can change the GPU renderer and resolution scale just for that game
- These settings override the global settings only for this specific game
Example setup:
- Crash Bandicoot → 3x upscale (light game, can handle it)
- God of War → 1x or 2x upscale (heavy game, needs more power)
- Gran Turismo → 2x upscale, OpenGL renderer (smoother on most devices)
This is the smartest way to get the best performance across your whole game library without constantly going into settings.
Adding Cover Art and Customizing the App {#cover-art}
Your game list will look pretty plain at first — just a title with no image. Let’s fix that and make it look amazing.
Adding Cover Art
- Open your phone’s browser and search for “PS2 covers GitHub” — it will be the top result
- There are two options: 3D Covers or Default Covers — choose whichever you like
- Copy the download link for your chosen style
- Go back to NetherSX2 → tap the burger menu → tap Download Covers
- Delete any existing URL and paste in your link → tap Download
- Your covers will appear on all your games automatically
Switch to Grid View
Once you have covers, switch to grid view — it looks much more like a real game library. Tap the grid icon in the top right corner of the game list.
Add a Background
Go to the burger menu → Download Background and pick one you like. Small touches like this make the emulator feel much more polished.
Override a Cover Manually
If a game has the wrong cover or no cover, press and hold it → tap Change Cover Image → pick your own image. Neat!
Troubleshooting Common Problems {#troubleshooting}
Even with a perfect setup, things sometimes go wrong. Here are the most common issues and how to fix them.
Problem: BIOS Import Failed
Fix: Do not try to import during first launch. Instead go to the burger menu → App Settings → BIOS → Import BIOS → find your BIOS file and import from there. This always works.
Problem: Game is Not Showing Up in the List
Fix: Tap the burger menu → Scan for New Games. The app will re-scan your PS2 folder and find any games you added after the first setup.
Problem: Game is Running Slowly or Lagging
Fix (try in order):
- Lower the upscale multiplier (e.g. from 3x to 1x)
- Switch from Vulkan to OpenGL renderer
- Use per-game settings to lower just that game’s resolution
- Enable Fast Unsafe Defaults in App Settings if you haven’t already
Problem: Audio Sounds Out of Sync
Fix: If you are using Bluetooth headphones, this is normal. Bluetooth headphones add a tiny delay which makes audio feel out of sync with the video. Switch to wired headphones or your phone’s speaker and the problem will disappear. It is not a bug in the emulator.
Problem: Graphical Glitches or Black Screen
Fix: This sometimes happens on older phones with Mali GPUs (common in older Samsung and Huawei phones) when using the Vulkan renderer in NetherSX2 v2.0. Switch to OpenGL in the GPU renderer settings and the glitches should stop.
Problem: Save State Won’t Load
Fix: Make sure you are loading from the same version of NetherSX2 you saved with. If you updated the app (e.g. from Classic to Standard version), old save states may not be compatible. Always back up your save states before updating.
NetherSX2 vs AetherSX2 — Which is Better? {#comparison}
A lot of people ask this question. Here is the simple answer:
AetherSX2 stopped getting updates in early 2023. The developer had to stop working on it. It still works, but it will never get new features, bug fixes, or support for newer Android versions.
NetherSX2 is actively maintained — it got a major v2.0 update in June 2025 and keeps improving.
| Feature | NetherSX2 | AetherSX2 |
|---|---|---|
| Still receiving updates | ✅ Yes | ❌ No (discontinued) |
| Latest Android support | ✅ Yes | ❌ Falling behind |
| Performance on new phones | ✅ Better | ⚠️ Decent but older |
| Ad-free | ✅ Yes | ✅ Yes |
| Open source | ✅ Yes | ✅ Yes |
| Two versions (Classic + Standard) | ✅ Yes | ❌ No |
| Best for beginners | ✅ Yes | ✅ Still fine |
Classic (Build 3668) vs Standard (Build 4248)
When you download NetherSX2 v2.0, you will see two options:
- Standard (4248) — the latest version with all new features and improvements. Start here.
- Classic (3668) — an older but more stable version. Use this if the standard version has issues on your specific phone.
Important: You cannot install both at the same time. Save states from one version do NOT work in the other. Always back up before switching.
Our recommendation: Start with Standard. If you have problems (especially on older phones or Mali GPU devices), switch to Classic.
Frequently Asked Questions {#faq}
-
Is NetherSX2 safe to download?
Yes, if you download from the official GitHub (Trixarian/NetherSX2-patch) or nethersx2.org. Never download APKs from random websites — they can contain viruses.
-
Is using NetherSX2 legal?
The emulator itself is completely legal. However, you must own the original PS2 games and console to legally use BIOS files and game ROMs. Downloading them from the internet without ownership is illegal in most countries.
-
Does NetherSX2 work on iOS or PC?
No. NetherSX2 is an Android-only app. For PC, use PCSX2 instead (it is the original and excellent).
-
What phone do I need for good PS2 emulation?
Any phone made in the last 3–4 years with a decent processor (Snapdragon 700 series or better) will handle most games at 1x–2x upscale. High-end phones (Snapdragon 8 Gen series, Samsung Exynos top models) can run 3x upscale on most games smoothly.
-
How do I update NetherSX2?
Go to the GitHub page → download the latest APK → install it over your existing app. Your settings will be kept. Back up your save states first before updating, just to be safe.
-
How do I add saves to NetherSX2?
There are two ways: use the in-game memory card saves (you need to create an 8MB memory card first in App Settings), or use save states (press back mid-game → Save State → choose a slot). See Section 7 for full details.
-
What is the difference between Classic and Standard?
Standard (4248) is the newer version with more features. Classic (3668) is based on an older, more stable base. You cannot run both at the same time and their save states are not cross-compatible. Start with Standard.
-
My game runs perfectly but looks blurry. How do I sharpen it?
Increase the upscale multiplier in settings. Go to burger menu → App Settings → GPU Settings → increase Upscale Multiplier from 1x to 2x or 3x. This makes games look much sharper but uses more power.
-
Can I use a PS4 or Xbox controller?
Yes! Connect your controller via Bluetooth, then go to Controller Settings → Automatic Mapping. NetherSX2 recognizes most modern controllers automatically.
-
Why does my audio sound delayed?
Almost always caused by Bluetooth headphones. This is a Bluetooth latency issue, not a bug. Use wired headphones or your phone speaker for perfect audio sync.
Final Thoughts
Setting up NetherSX2 is not that hard once you know the right steps — and now you do! Here is a quick recap of the most important things to remember:
- Always download from the official source (GitHub or nethersx2.org)
- Set up your folder structure before installing the app
- Use EX File Manager to move your files
- Start with Vulkan renderer and 1x upscale — then push up from there
- Create an 8MB memory card before playing any game
- Use save states whenever you want — they are one of the best features of emulation
- If something breaks, check the troubleshooting section above
We played Crash Bandicoot: Wrath of Cortex at 3x upscale on a Samsung Galaxy Fold 7 and it ran beautifully. With the right settings, your phone can genuinely feel like a portable PS2.
If you have any questions, drop them in the comments below. Happy gaming!
This article is for educational purposes only. Always own the original games and console before using ROMs and BIOS files. NetherSX2 is not affiliated with Sony Interactive Entertainment.